
News
Medis Tips, Tricks & Shortcuts 1st edition
04-08-2022
Is it possible to compare 2 MR studies in Medis Suite?
Yes, that is possible. You can load a second MR or another modality study via priors. How to: After you have opened the first study, go back to the browser and click with your right mouse button on the second study you want to open. From the dropdown menu, choose ‘Load as prior exam…’. The second study will be loaded in a separate screen with at the bottom right the text ‘Prior exam’. In Figure 1 you will see an example of 2 studies next to each other, in this case comparing series in the viewer but you can also compare analyses in this way. 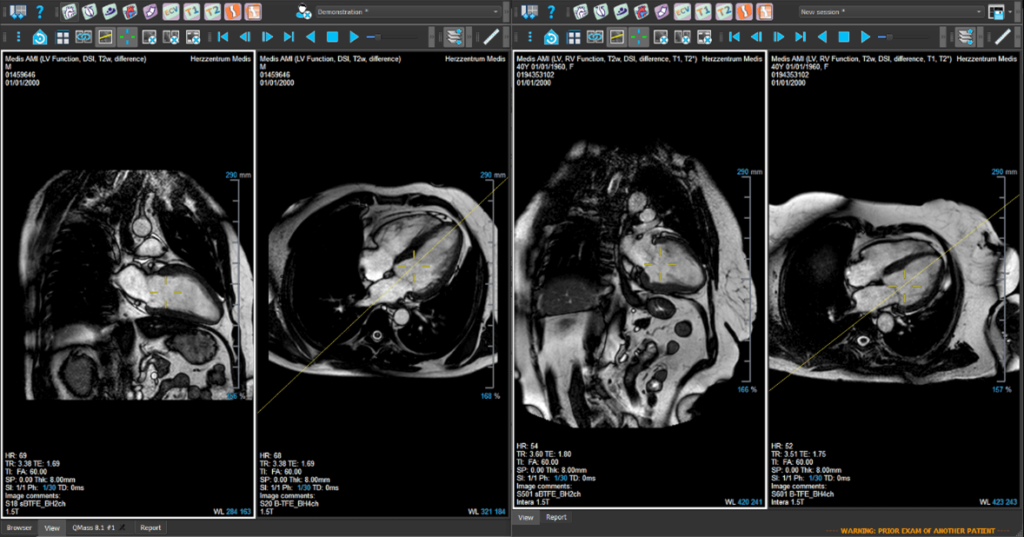
I receive a DICOM reading error with JPG2000 compression. What should I do?
When you have a (new) PACS system which will compress the DICOM according to JPG2000 standards this might give a warning when trying to open these DICOM files in Medis without a specific license.
Please reach out to our support team (support@medisimaging.com), they can provide you with a specific license which makes sure you can read those DICOM files in Medis Suite without any additional costs.
Can I collect parameters for the ventricular volume time curve, PER, TPER, PFR and TPFR?
Yes, you can obtain all these parameters when you have the ventricular contours in all phases. You can view the volume time curves in the application and take a screenshot to add it to the report. The filling dynamics are directly available in the report tab.
How to: To obtain the contour segmentation for all phases we advise to use the deep learning AutoQ contours, drag them with the Shift button pressed to your QMass analysis.
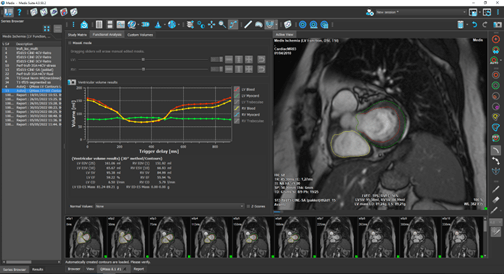
For the ventricular volume time curve, click on the ‘Functional Analysis’ tab in the upper part of the QMass application, here the curve will be shown directly. With the snapshot tool you will be able to list the graph in your report.
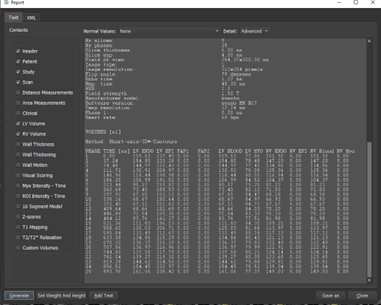
If you want to be able to regenerate the curve yourself, the numbers can be exported from the advanced reporting in QMass. Click on the 3 dots > View > Report or press F9 to get the advanced report. Select LV and/or RV volume, set the detail level to Advanced and press Generate. A table will be generated which can be exported by the Save as button in either text or csv file.
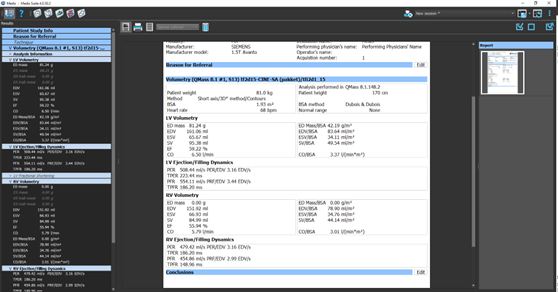
For the filling dynamics, select in the report tab on the left-hand side, the LV and/or RV filling dynamics. This will display among others the PEF, TPER, PFR, and TPFR in the report.
Can I extract from the LV autoQ contours the max myocardial thickness bullseye?
Yes, you can get a bullseye plot of the myocardial thickness, independent of how you have traced your endo- and epicardial boarders. How to: After you have checked your contours in the Function Short Axis, place a reference point with this icon at the inferior intersection point between the left and right ventricles. Now click on the bullseye icon with a Q in it (of Quantification) at the top toolbar. By default, it will show you the wall motion bullseye plot, click therefore on the dropdown menu and select either Wall Thickness (ED) or Wall Thickness (ES) to get the right bullseye. With the snapshot button at the upper right, the image will be saved to your report.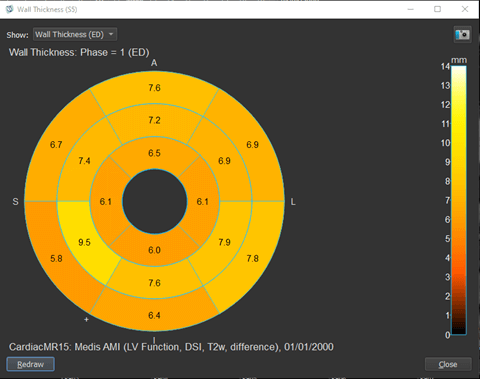
Where can I find training materials for QFR®?
You can find QFR® training materials/videos on the Medis website and YouTube channel:
Certified QFR users, also receive a “white paper” which is a detailed step-by-step guide. If there are more personalized questions, please reach out to our technical support team via: support@medisimaging.com
Share this article on:
